
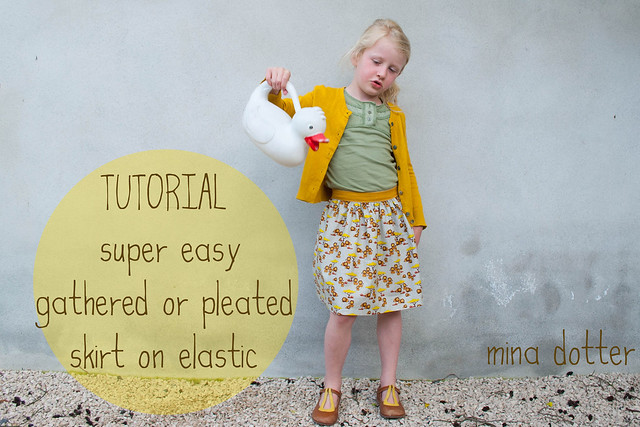
I am so excited to participate in Skirt Week 2013 over at Crafterhours. As a former Skirt Week winner, I am a big fan of this project full of tutorials, lots of skirt (p)inspiration and dashing prizes. Did you participate? It is not too late to enter your skirt. Have a go!

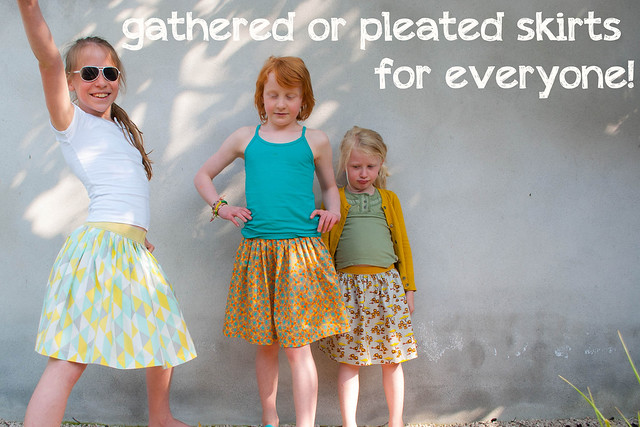
Anyhow, I was honoured when the ladies from Crafterhours asked me to post a tutorial during Skirt Week 2013. I just happened to recently post a tutorial for a super easy gathered skirt on elastic waistband. We agreed to translate it and I added an extra option for a pleated skirt in stead of a gathered one.
Sometimes making clothes for your children should be quick and easy. Mass production or instant gratification are the goal.
This is such a project.
It will take you no more than an hour to whip up one of these beauties. Maybe not the first time you make one, but once you get the hang of it you'll just breeze through it.
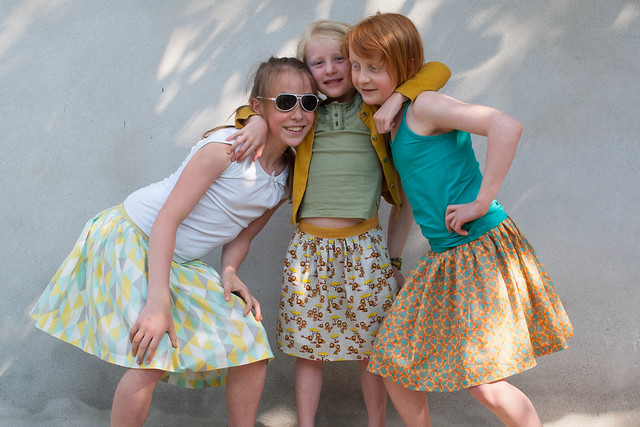
I have already made a dozen of these skirts...for my three girls, but also as a present for their friends, our nieces, ... They are so much fun.
Have you never sewn a skirt before? This is a perfect beginners project. I will take you through the proces, step by step.
Let's start.
This is such a project.
It will take you no more than an hour to whip up one of these beauties. Maybe not the first time you make one, but once you get the hang of it you'll just breeze through it.
I have already made a dozen of these skirts...for my three girls, but also as a present for their friends, our nieces, ... They are so much fun.
Have you never sewn a skirt before? This is a perfect beginners project. I will take you through the proces, step by step.
Let's start.
SUPPLIES
- fabric
- elastic
- thread in colors matching the elastic and the fabric
- sewing machine
- serger (if you have one)
- pins
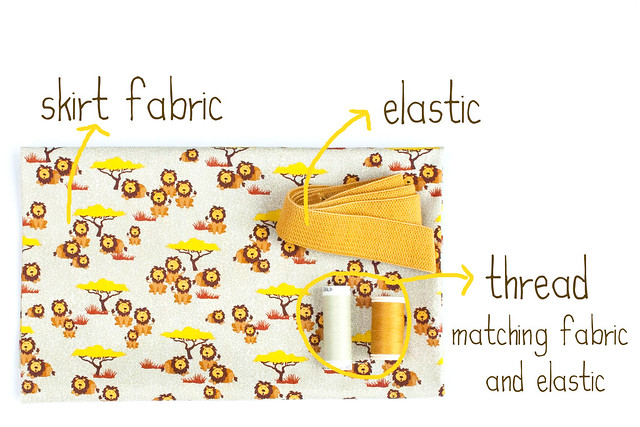
ELASTIC
Elastic comes in a wide variety of widths and strengths. It can he hard to find the color you had in mind. Buying standard white elastic and dyeing it could be an answer to this problem.
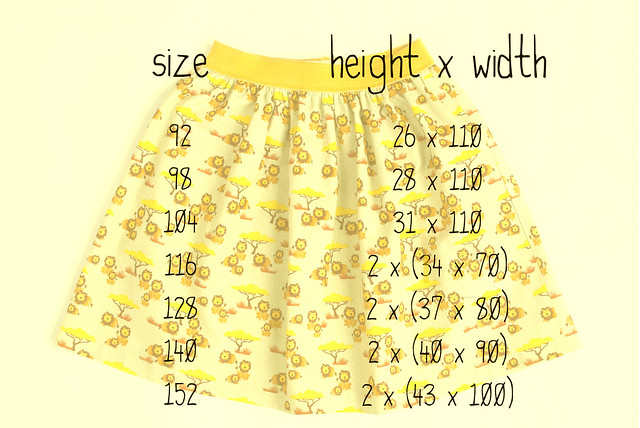
HOW MUCH FABRIC DO YOU NEED?
- In the picture below, fabric dimensions are given for ages between 2 year (size 92) and 12 years (size 152). For conversion of European to US sizes, click here.
- The dimensions below are in centimeter. Divide by 2,54 to get the dimensions in inches.
- Seam allowances and hem size are included in the dimensions.
- The dimensions below are in centimeter. Divide by 2,54 to get the dimensions in inches.
- Seam allowances and hem size are included in the dimensions.
- Up to the age of 4 (size 104) you need only the skirt's heigth in fabric, since most designer fabrics are 110cm (44 inch) wide.
- From age 6 (size 116) and up you need to cut two fabric pieces and sew them together to get one long panel of fabric.
- You can use more width for a more full skirt.
TUTORIAL
STEP 1 / PREPARATION
- Finish off all raw edges of your skirt fabric with a serger to prevent ravelling and fraying of the fabric. This will also give you garment a more professional look. If you don't have a serger, use the zigzag stitch on your sewing machine.

STEP 2 / ELASTIC
- Measure the length of the elastic on your child. Fit it around the waist so that it is tight, but not too tight. Cut your elastic with two centimeter (1 inch) extra seam allowance.
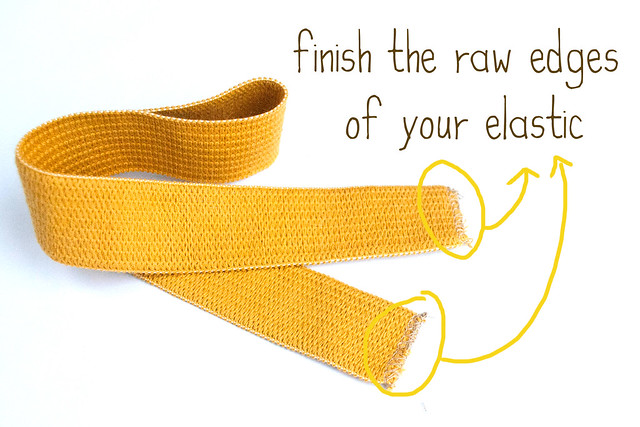
- Finish off the raw edges of your elastic with a serger or zigzag stitch.
- Finish off the raw edges of your elastic with a serger or zigzag stitch.
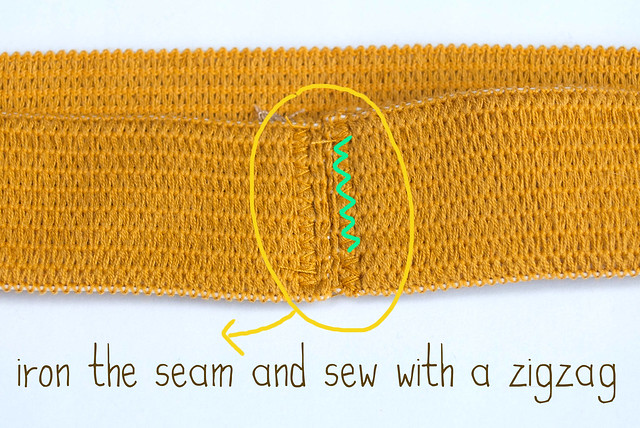
- Make one closed circle of elastic by sewing the ends together, with right sides facing eachother. Use a 1 cm (appx 0,5 inch) seam allowance.
- Be sure to backstitch at beginning and end.
- Be sure to backstitch at beginning and end.

- Press open the seam, and sew down both sides down using a zigzag stitch.
- Be sure to backstitch at beginning and end.
- Be sure to backstitch at beginning and end.
- Divide the elastic in 4 equal parts.
- Put aside the elastic for now. Time to work on the skirt.
- Put aside the elastic for now. Time to work on the skirt.

STEP 3 / GATHER THE SKIRT
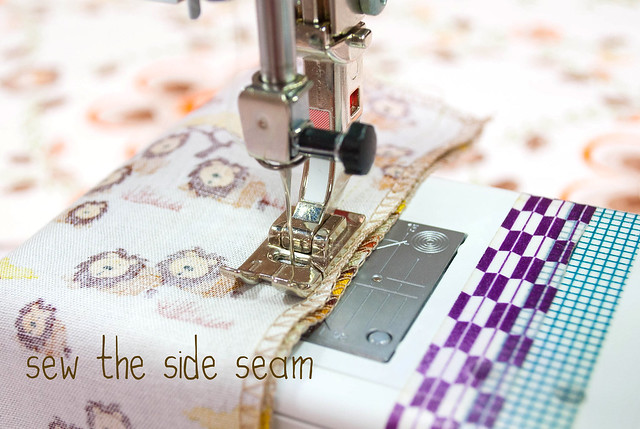
- Fold the fabric right sides together, matching up the edges. Sew the side seam of the skirt, with a seam allowance of 1 cm ( appx. 0,5 inch).
- Again, backstitch at the beginning and the end.
- Again, backstitch at the beginning and the end.
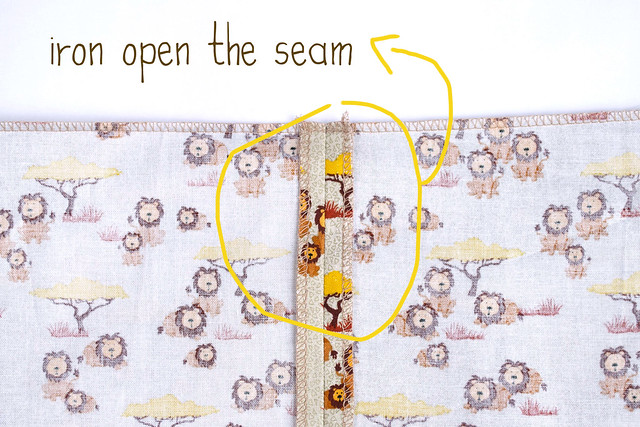
- Iron open the seam allowance. This prevents seams from becoming bulky and uncomfortable. It also gives your garment a more neat and professional look.
- You now have a closed tube of fabric.
- You now have a closed tube of fabric.
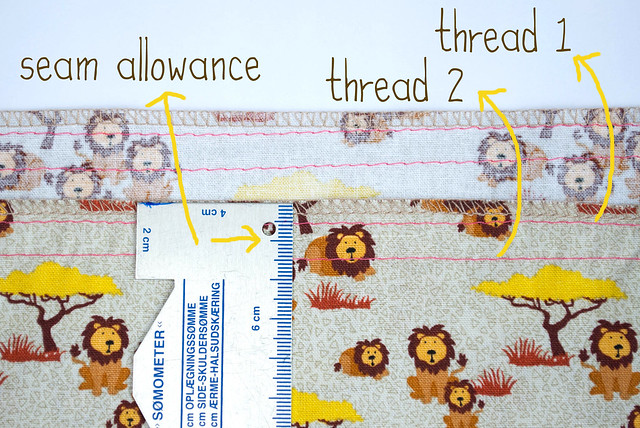
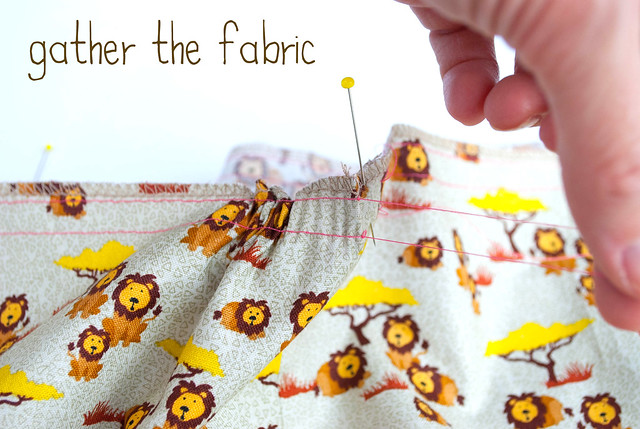
- Time for some gathering. If you have never done this before, go and have a look over at Made. I always gather with two threads, that I position so that my seam allowance fits just in between the two threads.
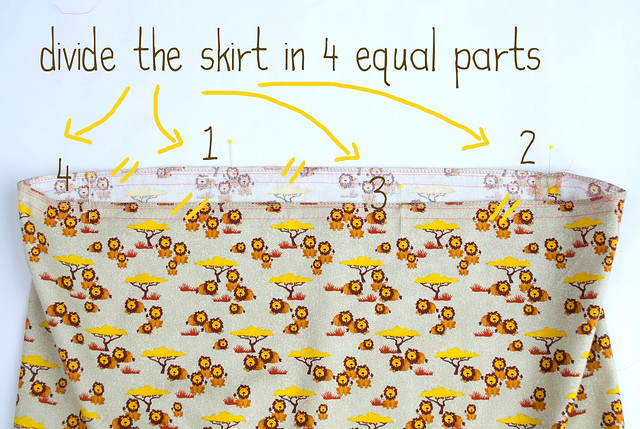
- Divide the skirt in 4 equal parts.
STEP 4 / ELASTIC AND SKIRT
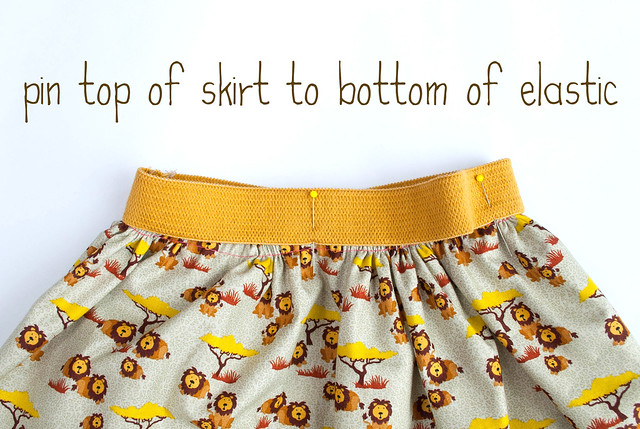
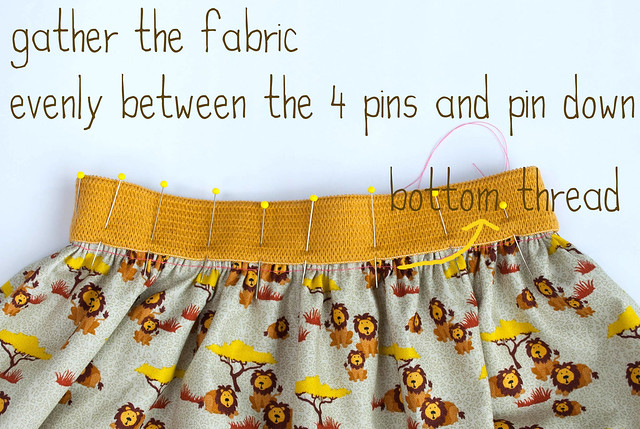
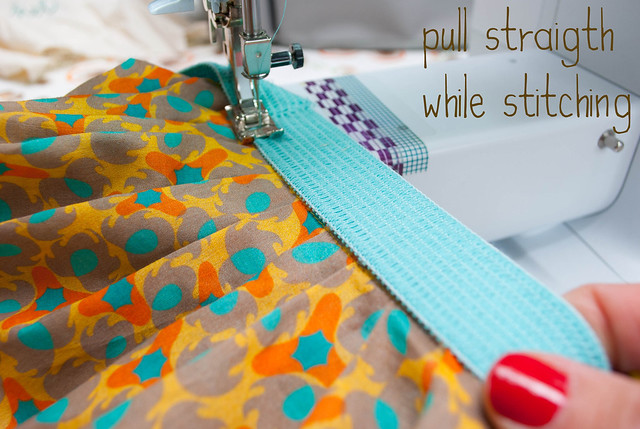
- Match up the 4 pins of the elastic to the 4 pins on the skirt. The wrong side of the bottom of the elastic should be placed on the wright side of the top of the skirt fabric.
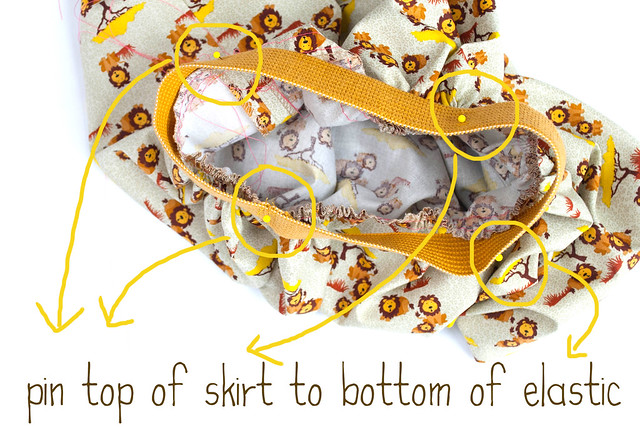
- Gather the fabric so that it is evenly distributed between the four pins. Again, Dana from Made explains you how to do this if you have no experience with gathering of fabric.
- Pin down the elastic to the skirt. The bottom gathering thread should be visible below the elastic. You can use this thread as a guideline so you have the same seam allowance throughout the whole skirt.
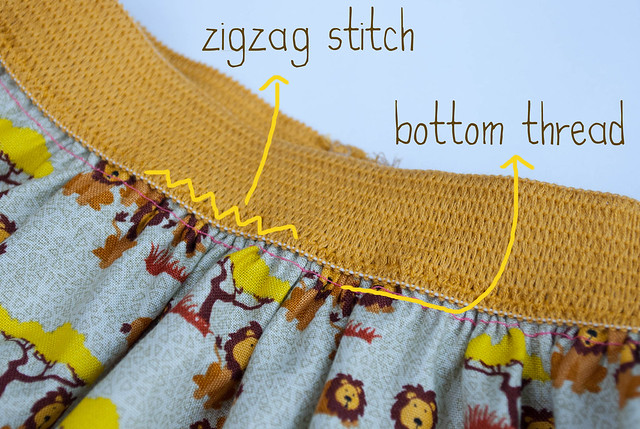
- Time to sew the elastic to the skirt. Use a zigzag stitch, because this gives your seam the elasticity that is needed when your child puts on the skirt.
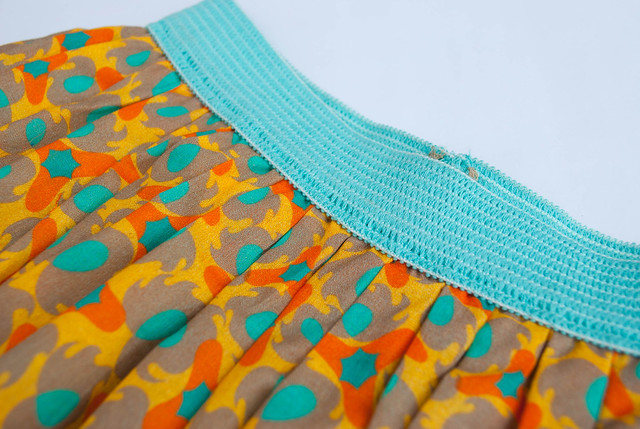
- Sew as close to the edge of the elastic as possible to prevent curling over of the elastic.

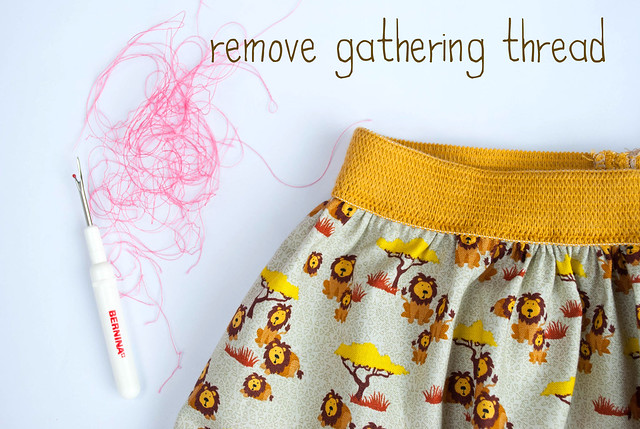
- Remove both gathering threads.

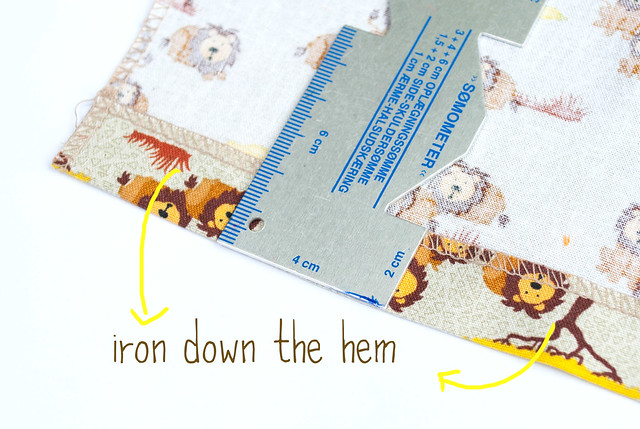
STEP 5 / THE HEM
- Iron the edge of the skirt under. I normally do this before step 2 (as you can see the side seam is not closed yet), because it is easier to iron on a flat piece of fabric before the skirt is all gathered up.
- The dimensions include a hem of 2 cm (appx 1 inch). But you can put the skirt on your child and determine how much hem you need.
- Sew down the hem. For top stitching I always use a stitch length of 3 in stead of 2.5.
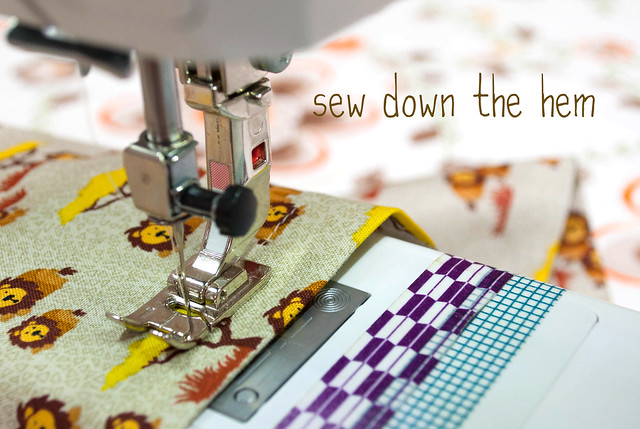
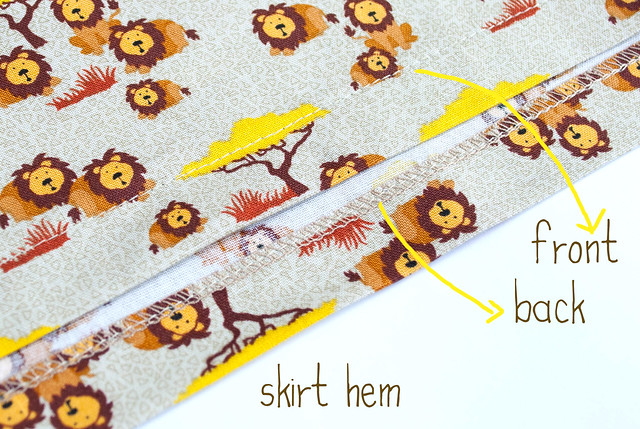
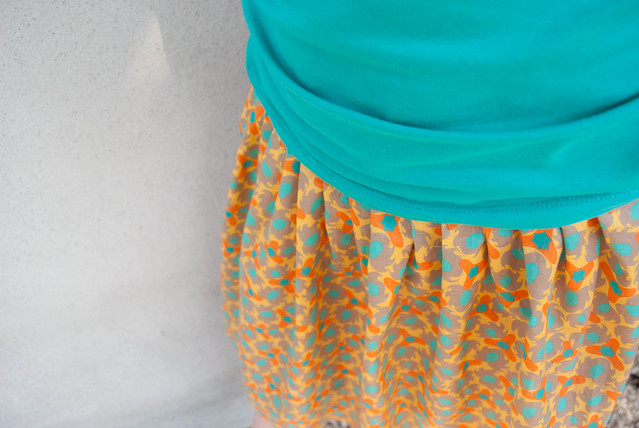
- Voila. Your skirt is finished. How easy was that? Enjoy!
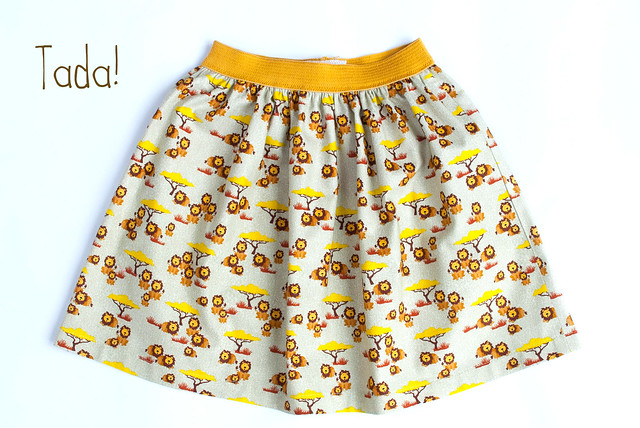
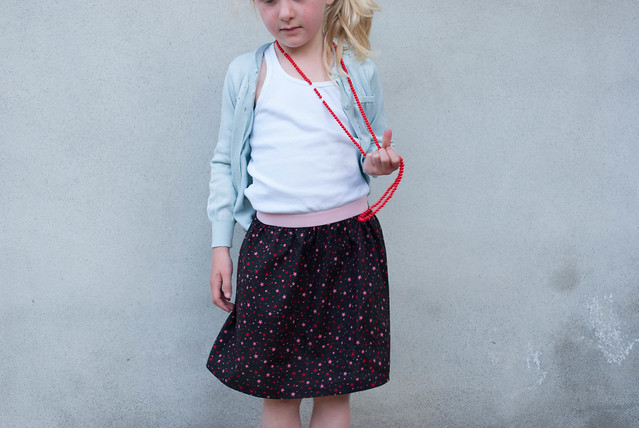
My five year old is a skirtaholic. Wearing pants equals horror for Roos. You can not imagine the hours she spends in front of her wardobe pondering over which skirt she will wear that day.
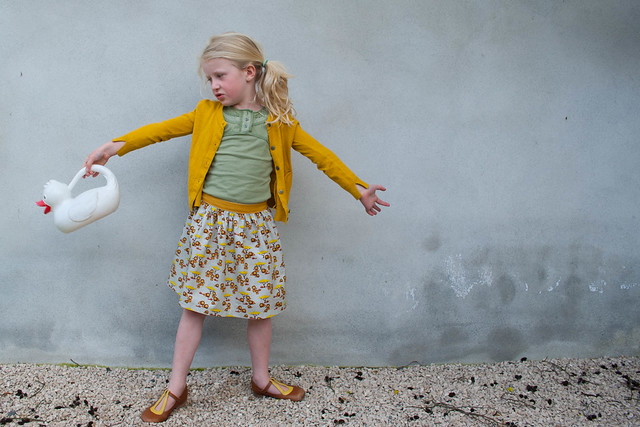
So I made her some easy peasy skirts and scored big time.
Not a big fan of gathering. Maybe you are more a pleats kind of person? Let's make some pleats then.
Pleating is just another way to diminish the length of fabric by folding. Step 1 and 2 are the same as for the gathered skirt.
STEP 3 / PLEAT THE SKIRT
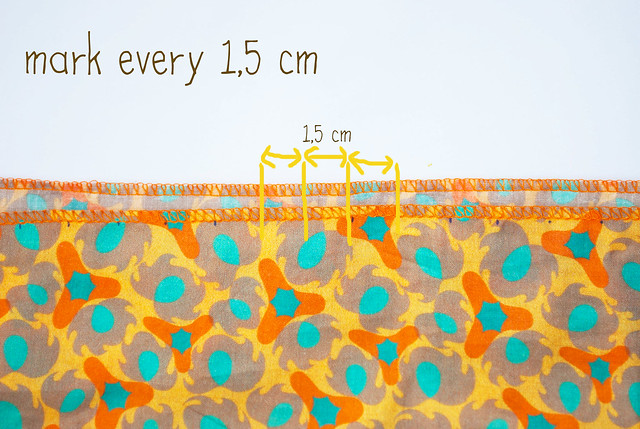
- Decide how big you want your pleats. I decided on 1,5 cm. You can make bigger pleats if you want, I would not recommend smaller ones. We'll stick with 1,5 cm for the tutorial.
- Every pleat you make needs three times that amount of fabric. So for one pleat of 1,5 cm you need 4,5 cm of fabric.
- You can adapt the width of your skirt panel so that it fits an even amount of pleats (an even amount of 4,5 cm in this case) (take in considereation your seam allowance!), or you can cheat a little bit at the beginning and end as I did here (shame shame).
- Fold the fabric right sides together, matching up the edges. Sew the side seam of the skirt, with a seam allowance of 1 cm ( appx. 0,5 inch).
- Make a mark on the top of your skirt fabric every 1,5 cm.
- Now pleat the fabric. Go all the way around the skirt.

- Use pins to secure the pleats. You can iron them to keep them in place.
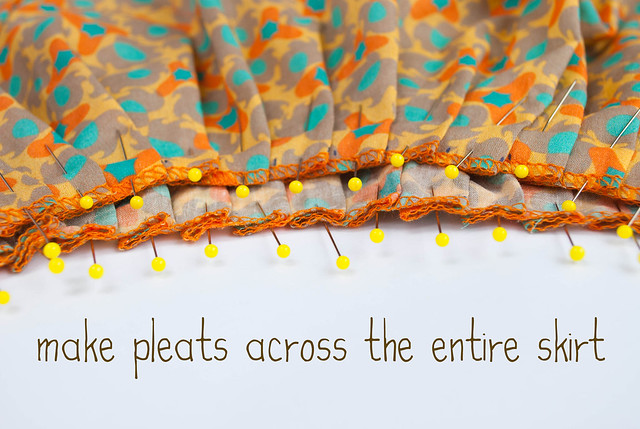
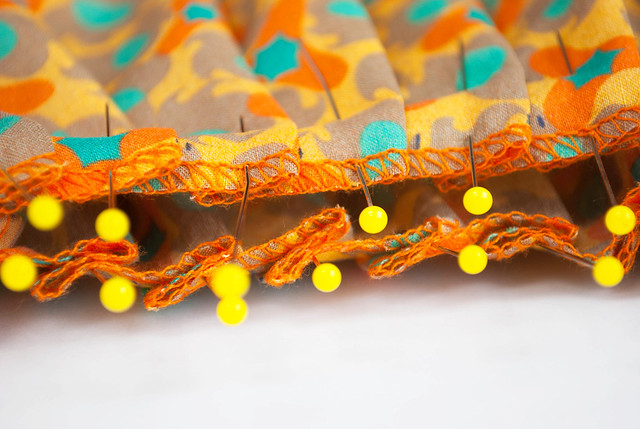
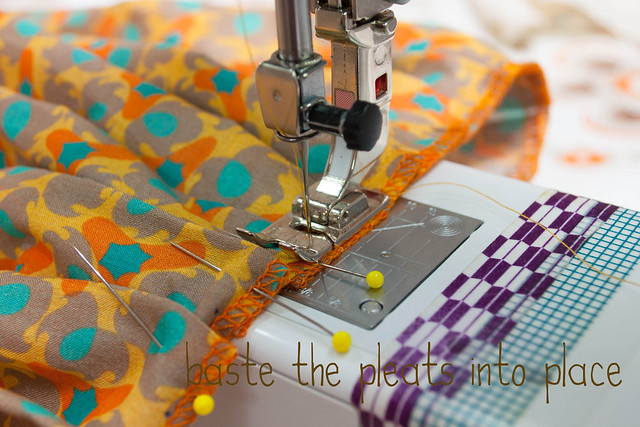
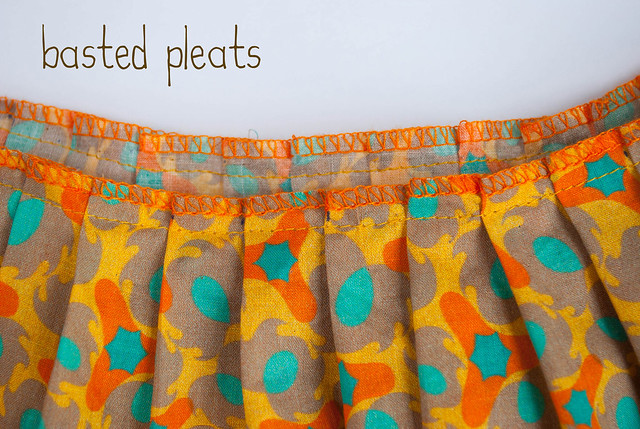
- Baste the pleats into place along the waistline.
- Divide the skirt in 4 equal parts.
STEP 4 / ELASTIC AND SKIRT
- Match up the 4 pins of the elastic to the 4 pins on the skirt. The wrong side of the bottom of the elastic should be placed on the wright side of the top of the skirt fabric.
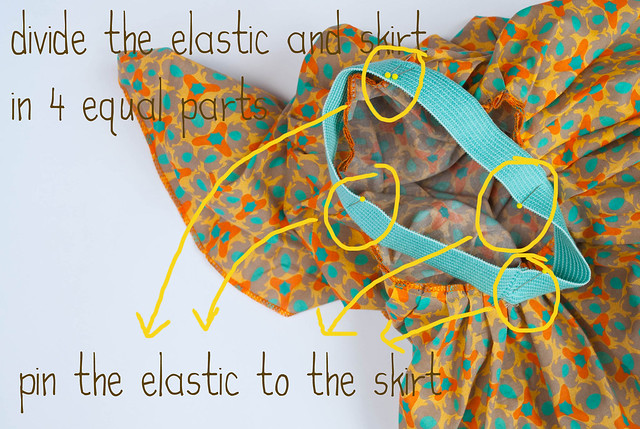
- The size of your elastic is slightly bigger than the skirt. This is how it should be. When sewing the skirt to the elastic (using a zigzag stitch), gently stretch the elastic as you go so that it matches up to the skirt length. Sew from pin to pin.

Sew the hem et voila...your pleated skirt is ready for some action.
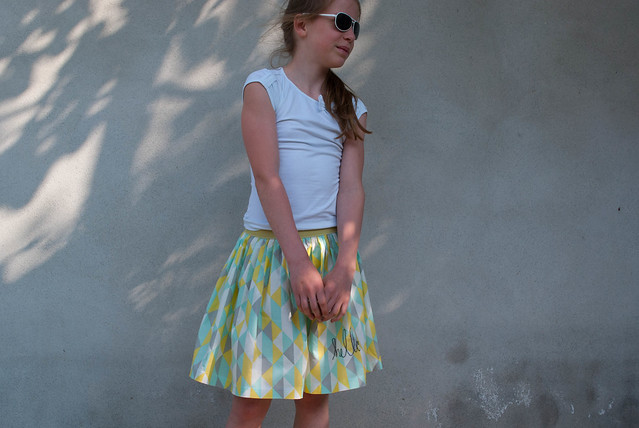
I made a pleated version for my 9 year old daughter Janne...

...and my 11 year old.
- The dimensions include a hem of 2 cm (appx 1 inch). But you can put the skirt on your child and determine how much hem you need.
- Sew down the hem. For top stitching I always use a stitch length of 3 in stead of 2.5.
- Voila. Your skirt is finished. How easy was that? Enjoy!
My five year old is a skirtaholic. Wearing pants equals horror for Roos. You can not imagine the hours she spends in front of her wardobe pondering over which skirt she will wear that day.
So I made her some easy peasy skirts and scored big time.
Not a big fan of gathering. Maybe you are more a pleats kind of person? Let's make some pleats then.
Pleating is just another way to diminish the length of fabric by folding. Step 1 and 2 are the same as for the gathered skirt.
STEP 3 / PLEAT THE SKIRT
- Decide how big you want your pleats. I decided on 1,5 cm. You can make bigger pleats if you want, I would not recommend smaller ones. We'll stick with 1,5 cm for the tutorial.
- Every pleat you make needs three times that amount of fabric. So for one pleat of 1,5 cm you need 4,5 cm of fabric.
- You can adapt the width of your skirt panel so that it fits an even amount of pleats (an even amount of 4,5 cm in this case) (take in considereation your seam allowance!), or you can cheat a little bit at the beginning and end as I did here (shame shame).
- Fold the fabric right sides together, matching up the edges. Sew the side seam of the skirt, with a seam allowance of 1 cm ( appx. 0,5 inch).
- Make a mark on the top of your skirt fabric every 1,5 cm.
- Now pleat the fabric. Go all the way around the skirt.
- Use pins to secure the pleats. You can iron them to keep them in place.
- Baste the pleats into place along the waistline.
- Divide the skirt in 4 equal parts.
STEP 4 / ELASTIC AND SKIRT
- Match up the 4 pins of the elastic to the 4 pins on the skirt. The wrong side of the bottom of the elastic should be placed on the wright side of the top of the skirt fabric.
- The size of your elastic is slightly bigger than the skirt. This is how it should be. When sewing the skirt to the elastic (using a zigzag stitch), gently stretch the elastic as you go so that it matches up to the skirt length. Sew from pin to pin.
Sew the hem et voila...your pleated skirt is ready for some action.
I made a pleated version for my 9 year old daughter Janne...
...and my 11 year old.
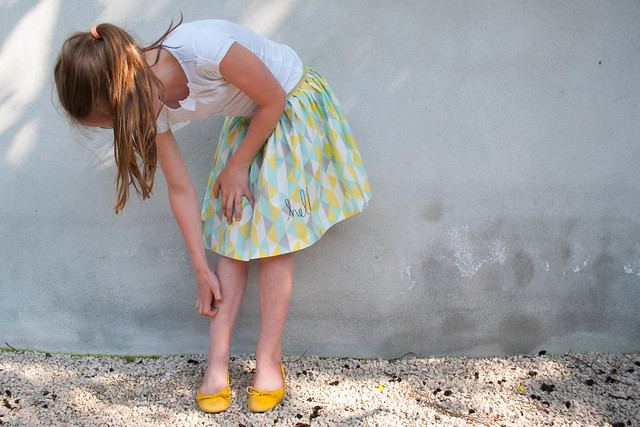

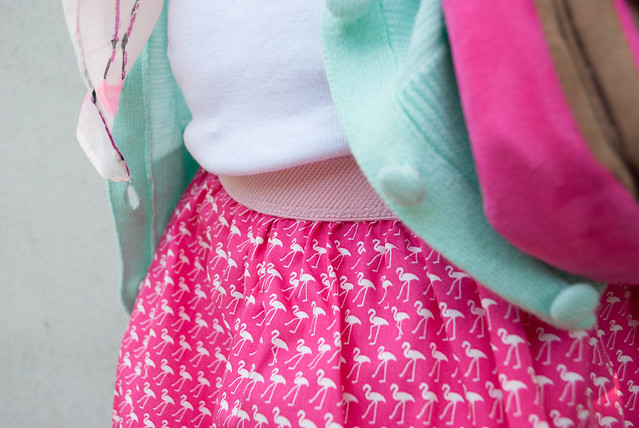
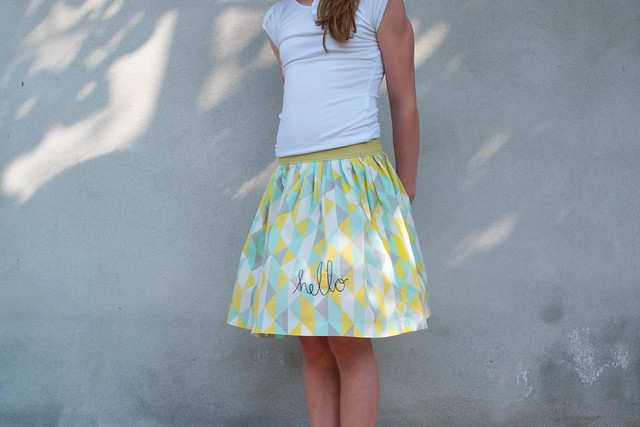
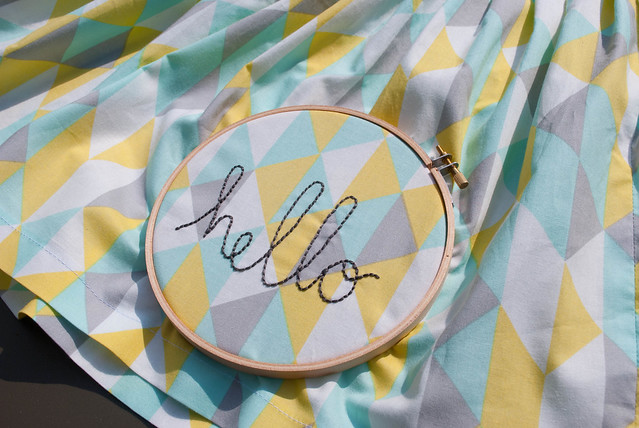
You can leave it at that or you can step it up another level by adding pockets, applying some color blocking or by spicing it up with some embroidery as I did for Stien.

Now there's only one more thing left to say:
super! (oh en lang leve de zon)
BeantwoordenVerwijderenPrachtig!!! Waarom moeilijk doen als het makkelijk kan?
BeantwoordenVerwijderenWAUW, wauw, wauw, ...
BeantwoordenVerwijderendit is nog veel makkelijker dan ik dacht!
BeantwoordenVerwijderenDit ga ik ook proberen! Hoe zit het met damesmaten (laten we zeggen 38-40) heb je daar misschien ook een richtlijn voor voor de hoeveelheid stof?
BeantwoordenVerwijderenMaar gij! You read my mind: dat met die plooien zat in mijn hoofd om te proberen. Nu gaat me dat ongetwijfeld van de eerste keer lukken! Thank you, thank you, thank you! Je rokjes zijn stuk voor stuk prachtexemplaren.
BeantwoordenVerwijderenleuk!! bedankt!
BeantwoordenVerwijderenLeuk gedaan. Alleen jammer dat ik geen meiden heb. Ons manneke staat een broek toch beter.
BeantwoordenVerwijderenSchoontjes! Bedankt voor de deskundige uitleg!
BeantwoordenVerwijderenyou go girl!
BeantwoordenVerwijderenDie 'hello' maakt het helemaal àf! (Zou ik dat nog mogen dragen of gaan ze dan heel vreemd kijken op mijn werk :-)?)
BeantwoordenVerwijderenAha daar zijn die leuke Dotter-sisters weer!
BeantwoordenVerwijderen:-)
I LOVE the pleated elastic waist skirt! Super cute and great tutorial
BeantwoordenVerwijderenWederom GEWELDIG! enne... door jouw zinnetje "have a go" om mee te doen, heb ik het gewoon gedaan!!! merci!
BeantwoordenVerwijderenWow, Mina Dotter goes international! I like!
BeantwoordenVerwijderenTop!!
BeantwoordenVerwijderenHeel leuk! gaan we zeker eens proberen!
BeantwoordenVerwijderenDe 'hello'-versie is de max !
BeantwoordenVerwijderenWow ... Dit zou hier ook mega scoren bij de meiden ! Vooral fan van de flamingo stof !
BeantwoordenVerwijderenSuper mooie rokjes zeg!!
BeantwoordenVerwijderenIk ben al eens opzoek gegaan online voor die elastieken, maar tot nu toe zonder succes!
Enige tips waar we dat online kunnen kopen?
Gr
an
jace-did-it.blogspot.be
lijkt me een ideaal projectje (de gestropte versie) om een kind haar eigen rok te laten naaien,
BeantwoordenVerwijderenvolgend weekend ga ik m'n nichtje voor haar verjaardag (8) begeleiden in het zelf naaien van haar eigen rok. ik had eerst een A-lijntje met boordband in gedachten, maar dit lijkt me nog eenvoudiger.
heeft Mertens zo'n elastiek?
Did you buy those pretty colors of elastic or dye them yourself?
BeantwoordenVerwijderenUberzalige foto's! Echt een plezier om naar te kijken!
BeantwoordenVerwijderenhier ook een skirtaholic in huis, dus dit komt goed van pas :-)
BeantwoordenVerwijderenErg leuke rokjes en super uitleg!
BeantwoordenVerwijderenIk had deze gemist! Zeer mooie rokjes! Nog beter dan de vorige. De roklengte maakt het af, hé!
BeantwoordenVerwijderenHoe veel stof moet ik nemen voor een rokje in maat 38?
BeantwoordenVerwijderenDank u voor de verwijzingen naar onze winkel voor de elastiek. Het heeft even geduurd voor die weer voorradig was. We konden de vraag niet volgen. Heel mooie resultaten van rokjes!
BeantwoordenVerwijderenOkay, so these are so cute! And I like your instructions that go along so well with Dana's.
BeantwoordenVerwijderenJa hoor, het is gelukt. Mijn eerste rokje! Niet met elastiek, maar met een boordband van dezelfde stof. Kan niet wachten om het morgen bij mijn dochter aan te trekken. Bedankt voor de heldere uitleg! Groet, Renate
BeantwoordenVerwijderenWat een superleuke rokjes! Weer iets op mijn to do-lijstje ;)...
BeantwoordenVerwijderenEn jawel, ik heb weeral een rokje adhv jouw tutorial gemaakt!
BeantwoordenVerwijderenEen herfstproof rokje: http://querida-jotixa.blogspot.be/2013/10/kcw.html
Bedankt voor je uitleg!
Zo hartelijk bedankt ! Lief van u om dat allemaal zo mooi en duidelijk aan te brengen.
BeantwoordenVerwijderenDank voor de leuke tutorial! Ik heb er net een rokje mee gemaakt: http://pienkel.blogspot.nl/2014/01/simple-silver-skirt-weekly-pin-project.html
BeantwoordenVerwijderenToffe rokjes bij mooie meisjes en bedankt voor de hele uitleg.Ik ga van de zomer zo'n rokje eens proberen voor ons achternichtje.
BeantwoordenVerwijderenIs het elastiek niet korter dan de stof? Wel heel handige uitleg verder, vooral de berekening voor de plooien
BeantwoordenVerwijderenMaar u kunt ook wel geweldig recht stikken, zeg! Mooi en dank.
BeantwoordenVerwijderenZeer mooi. Mijn dochtertje wil graag dat haar rokje mooi omhoog waait als ze ronddraait. Hoe breder hoe liever. Is er ook een makkelijke manier om een cirkelrok op een elastiek te maken? Alvast bedankt voor de inspiratie.
BeantwoordenVerwijderen